
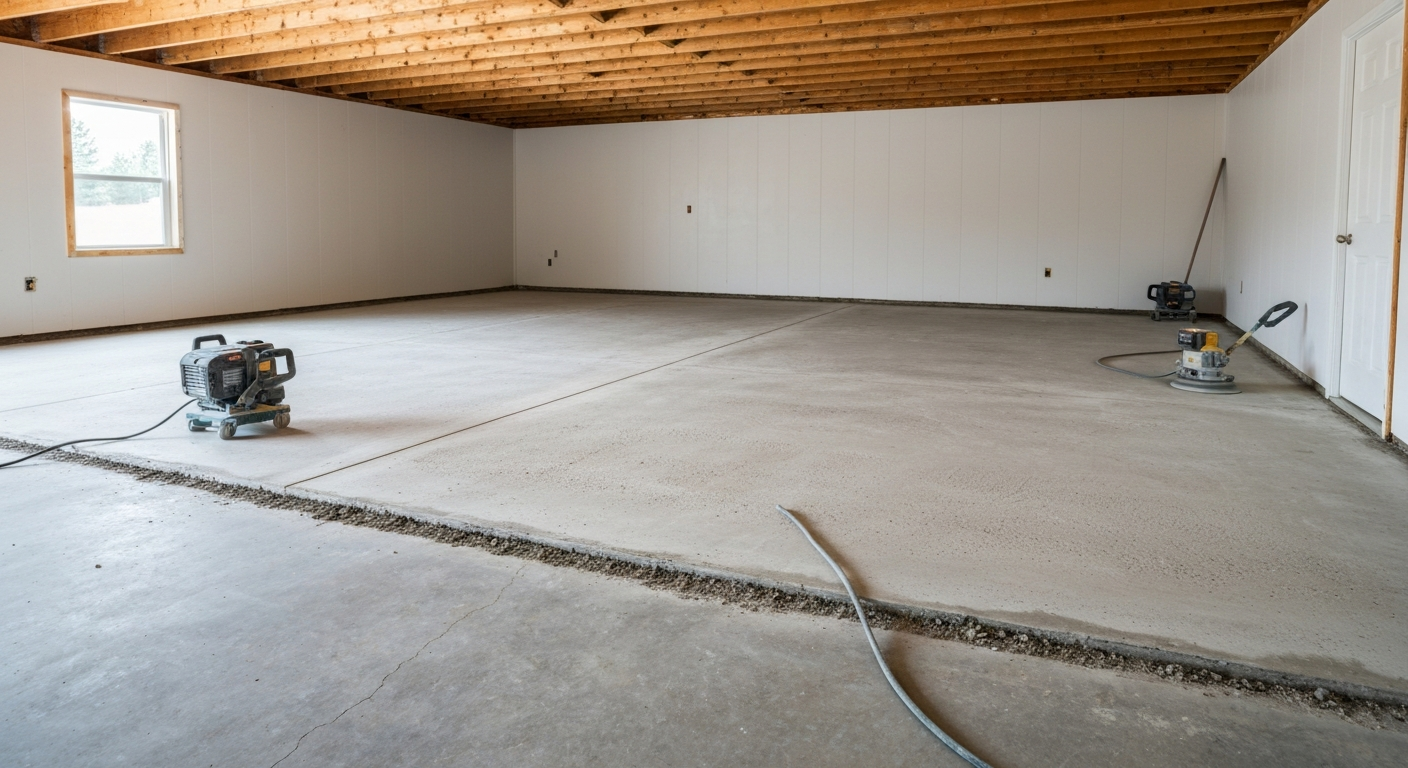
The correct answer to how to prep a garage floor for coating is straightforward: clean and degrease the slab, repair cracks and damaged areas, test for moisture, mechanically grind the surface to the required profile, remove all dust, inspect the floor, and only then apply the coating. Skipping or weakening any of those steps can shorten the life of an otherwise good epoxy or polyaspartic system.
Surface preparation—not the label on the coating container—is often the biggest difference between a floor that remains bonded and one that begins peeling beneath tires.
Quick Answer: Key Takeaways
- •Mechanical grinding is generally the preferred preparation method. It removes weak surface material and creates a controlled profile for the coating.
- •Acid etching is not equivalent to grinding. It may produce a minimal or inconsistent profile and does not reliably remove sealers, oil, or other contaminants.
- •Moisture must be evaluated. Vapor moving through a slab can cause blistering, soft spots, and delamination.
- •Cracks and spalls require diagnosis before repair. A coating can cover a repaired crack, but it cannot stop an active slab from moving.
- •Dust removal is part of surface preparation. Fine grinding dust left behind can become a bond-breaking layer.
- •The coating should not be opened until the slab is clean, sound, properly profiled, dry enough, and ready to receive it.
Why Preparation Matters More Than the Coating Label
Epoxy, polyaspartic, and other resin systems bond to the surface presented to them. If that surface consists of dust, weak cement paste, oil, sealer, curing compound, tire dressing, or deteriorated material, the coating may bond to the contamination rather than to sound concrete.
When that weak layer releases, the coating often comes with it.
Coating manufacturers identify inadequate surface preparation as a leading cause of resin-floor failure. Technical guidance also calls for mechanical grinding or shot blasting to create a profile suited to the thickness of the planned system.
This explains why a premium product can fail early while a more modest system performs well. Chemistry matters, but it cannot compensate for an unsuitable substrate.
A complete preparation process needs to answer five questions:
- Is the slab structurally and mechanically sound?
- Is it free of oil, sealer, residue, and other bond inhibitors?
- Is moisture moving through it at a level the system can tolerate?
- Has it been profiled for the selected coating?
- Are cracks, joints, edges, and damaged areas properly addressed?
Only after those questions are resolved is the floor ready for coating.
How to Prep a Garage Floor for Coating: The Professional Process
1. Clear the garage and inspect the entire slab
Everything should be removed from the floor, including shelving that blocks edges, loose mats, stored equipment, and temporary ramps.
The first inspection looks for:
- Existing paint or coating
- Oil and grease stains
- Tire marks and tire-dressing residue
- Concrete sealer or curing compound
- Cracks and control joints
- Spalling or scaling
- Soft, dusty surface material
- White mineral deposits
- Damp or dark areas
- Previous patches
- Low spots that hold snowmelt
- Damage along the garage-door line
Water beading on the surface may suggest that a sealer or contaminant is present. A previous coating that appears intact should still be checked for adhesion before it is used as the foundation for another system.
This inspection determines whether the project needs routine preparation, coating removal, localized repairs, moisture mitigation, or more extensive resurfacing.
2. Clean and degrease contaminated areas
Grinding should not be used as the only method for removing oil or chemical contamination. Grinding through an oily area can spread contamination across the floor or drive it deeper into the surface.
Oil, grease, tire products, winter residue, and cleaning chemicals should be addressed with suitable cleaners before mechanical preparation. More than one cleaning cycle may be required for deeply stained areas.
The process generally includes:
- Remove dry dirt and debris.
- Apply a compatible degreaser to contaminated areas.
- Agitate the cleaner rather than allowing it to sit untouched.
- Extract or rinse away the suspended contamination.
- Repeat as necessary.
- Allow sufficient drying time before testing and grinding.
Pressure washing can help remove surface grime in appropriate situations, but it introduces water into the slab. Manufacturer preparation guidance warns that high-pressure water can contribute to moisture-related concerns, so washing must be followed by adequate drying and moisture evaluation.
A stain that remains visible is not automatically still oily. The important question is whether bond-inhibiting material remains in the surface.
3. Repair cracks, spalls, and damaged edges
Cracks should be evaluated before they are filled. A narrow, stable shrinkage crack is different from a crack that changes width, shows vertical displacement, or continues through a moving joint.
Suitable repairs may include:
- Opening and cleaning stable cracks
- Removing weak material around spalls
- Filling surface voids with a compatible repair material
- Rebuilding damaged edges
- Correcting deteriorated areas near doorways
- Treating moving cracks or joints with a flexible detail
Surface irregularities, cracks, spalls, and damaged joints should be repaired or accommodated before the resin system is installed.
No repair should be presented as a guarantee that an active crack will never return. If the slab continues to move, a rigid repair or coating may crack with it.
Control joints also require deliberate treatment. Some may be filled as part of the floor design, while joints expected to move may need to remain functional. Covering every joint without determining its purpose can create a cleaner appearance initially but lead to cracking later.
4. Test the slab for moisture
A garage floor may look dry while moisture vapor is moving upward through it. Once a low-permeability coating is installed, that moisture may contribute to blistering, bubbles, soft spots, discoloration, or broad areas of delamination.
Three commonly discussed evaluation methods are:
Plastic-sheet test
A sealed plastic sheet can indicate the presence of capillary moisture near the surface. Darkened concrete or condensation beneath the sheet is a warning sign.
This is best treated as a preliminary screening method. ASTM D4263 is designed to indicate whether capillary moisture is present; it does not provide the same quantitative information as calcium-chloride or in-slab relative-humidity testing.
Calcium-chloride test
A calcium-chloride test measures the moisture-vapor emission rate from the slab surface over a defined period. The result can be compared with the coating manufacturer's allowable limit.
ASTM F1869 describes this method as a quantitative measurement of vapor emitted from a concrete floor, while also noting that the result reflects conditions at the time of testing.
In-slab relative-humidity probe
An in-slab probe measures relative humidity inside the concrete. ASTM F2170 notes that excessive slab moisture can contribute to debonding and deterioration of coatings and that readings represent the tested locations and conditions at that time.
No single reading should be separated from the product specification. A result that is acceptable for one primer or coating may exceed the limit of another.
When moisture is elevated, the correct response may involve a compatible moisture-mitigation primer, a different system, additional investigation, or postponing the work. Simply coating over the result does not remove the underlying condition.
5. Diamond-grind the floor to the specified profile
Diamond grinding removes weak surface paste, remaining coatings, minor surface defects, and material that interferes with adhesion. It also creates a controlled texture that gives the coating more surface area to grip.
The target is not "as rough as possible." It is the concrete surface profile required by the selected system.
The International Concrete Repair Institute uses standardized Concrete Surface Profile benchmarks to help specify and verify preparation. Different coating thicknesses and resin systems may require different profiles.
Professional grinding normally involves:
- A walk-behind grinder for open areas
- Hand grinders for edges and corners
- Appropriate diamond tooling for the slab
- Dust-control equipment
- Multiple passes where coatings or sealers are present
- Inspection for areas the grinder did not reach evenly
The finished floor should be uniformly open and profiled without glossy sections, loose paste, or isolated areas of old coating.
6. Vacuum and remove all dust
Grinding creates very fine dust. Leaving that dust on the floor can defeat the purpose of grinding by placing a loose layer between the slab and coating.
The surface should be vacuumed thoroughly with suitable dust-extraction equipment. Edges, joints, cracks, corners, and repaired areas require special attention because dust tends to collect there.
A clean hand or cloth passed over the floor should not pick up a visible layer of powder. Blowing dust around with compressed air is not a substitute for collecting it.
Wet cleaning after grinding is not always appropriate because it reintroduces moisture and may delay coating. The final cleaning method should follow the resin manufacturer's requirements.
7. Perform a final inspection
Before mixing any coating, inspect the floor under good lighting.
Confirm that:
- Oil and contaminants have been removed.
- Previous coatings and sealers are gone where required.
- The profile is uniform.
- Edges and corners have been prepared.
- Repairs are cured and properly finished.
- Joints have been treated according to the plan.
- Moisture results meet the selected system's limits.
- Dust and debris are absent.
- The slab and air are within the required temperature range.
- The surface is above the dew point and free of condensation.
- Materials, tools, and labor are staged for uninterrupted application.
Once a two-component coating is mixed, its working time begins. Preparation problems discovered at that point are difficult to correct without wasting material.
8. Apply the coating within the required conditions
Only after the slab passes final inspection should the primer, base coat, flakes, or topcoat be applied.
Air temperature alone is not enough. The floor temperature, humidity, dew point, ventilation, and expected conditions during cure all matter.
The product data sheet should control:
- Mixing ratio
- Mixing time
- Induction time, when applicable
- Application thickness
- Pot life
- Recoat window
- Minimum and maximum temperatures
- Moisture limits
- Foot-traffic timing
- Vehicle-return timing
Diamond Grinding vs. Acid Etching
Acid etching remains common in retail coating instructions, but it should not be treated as equivalent to mechanical profiling.
| Factor | Diamond grinding | Acid etching |
|---|---|---|
| Profile control | Produces a visible, mechanically created profile that can be matched to the coating system | Results may vary with slab density, finishing, dilution, dwell time, and rinsing |
| Weak surface removal | Removes laitance, weak paste, and minor surface deterioration | May react with the surface without removing all weak material uniformly |
| Coating and sealer removal | Can remove many existing coatings and sealers with suitable tooling | Does not reliably remove coatings, curing compounds, oil, or water-insoluble contamination |
| Water introduced | Dry grinding with extraction adds little or no water | Requires wetting and extensive rinsing, followed by drying |
| Edges and repairs | Can be controlled with hand tools and different tooling | Reaction may be inconsistent around repairs, dense areas, and old patches |
| Typical use | Preferred for professional resin-floor preparation | May be permitted by a specific thin-coat product but is not a general substitute for grinding |
Sherwin-Williams states that acid etching can produce unpredictable results, does not remove many common contaminants, and usually creates only a minimal profile. Its technical guidance favors mechanical preparation for modern resinous systems.
Acid etching also creates another challenge: the slab must be rinsed thoroughly and then allowed to dry. Residue or retained water can interfere with the coating that follows.
The fair conclusion is not that every etched floor fails. Some consumer products are specifically designed around an etching process. The limitation is that etching offers less control and does not solve contamination, moisture, weak concrete, or existing-coating problems.
Why DIY and Box-Store Preparation Often Falls Short
Homeowners can handle several useful preparation tasks, including clearing the garage, sweeping, basic washing, identifying stains, and documenting visible cracks.
Problems usually begin when a simple kit process is expected to solve a complicated slab condition.
Common failure points include:
- Assuming a clean-looking floor is free of sealer
- Applying coating over invisible tire-dressing residue
- Treating acid etching as coating removal
- Skipping moisture testing
- Filling every crack with the same rigid material
- Coating over loose or dusty surface paste
- Leaving grinding or etching residue behind
- Missing edges beneath drywall or door tracks
- Applying over a slab that is too cold
- Parking before full cure
The goal is not to discourage careful DIY work. It is to match the project method to the risk.
A newer, clean, dry, lightly used slab may be manageable with a product-specific DIY process. A stained floor, failed coating, damp slab, moving crack, or winter-damaged surface generally needs more evaluation and equipment.
The Montana and Flathead Valley Angle
Snowmelt and slab moisture are separate issues
Vehicles bring liquid water into a garage from above. Ground moisture and vapor can move through the slab from below.
Cleaning and drying the visible snowmelt does not prove that the slab has an acceptable internal moisture condition. Flathead Valley properties with drainage concerns, seasonally wet ground, or elevated groundwater deserve careful moisture evaluation before coating.
Freeze-thaw can widen existing damage
Water entering cracks and weak surface areas may freeze and contribute to additional deterioration. A coating can reduce liquid exposure from above after installation, but it cannot restore unsound material or stop an active crack from moving.
Scaling, spalls, loose edges, and widened cracks should be removed and repaired before coating rather than hidden beneath it.
Road salt and traction sand contaminate the surface
Montana road maintenance uses magnesium chloride, sodium chloride, and traction sand. Those materials enter garages on tires and undercarriages, leaving both chemical residue and abrasive grit behind.
The preparation process must remove that residue, especially along tire lanes and near the garage door. Grinding over a visibly dirty slab without prior cleaning can spread contamination.
Cold and humidity affect drying and cure
A heated garage can have warm air over a much colder slab. Washing or etching during cold weather may also leave moisture in the floor longer than expected.
Surface temperature, humidity, dew point, and moisture condition must be checked before coating. Fast-curing chemistry may widen the installation window, but it does not make a cold, damp, or condensing slab suitable.
Streamline Solutions' Take
"The most important coating decision is often made before the coating is opened. A garage slab should be cleaned, evaluated for moisture, repaired, mechanically ground to the required profile, and fully vacuumed. For most existing Flathead Valley garage floors, diamond grinding and moisture evaluation provide far more control than an etch-and-roll approach."
— Streamline Solutions, Kalispell, MT
How Streamline Solutions Can Help
Streamline Solutions prepares, coats, and restores existing garage slabs throughout the Flathead Valley. Property owners can review the overall concrete coating process, learn about surface preparation and cleaning, or explore garage floor resurfacing when an old coating or damaged surface must be removed. Information about finished epoxy garage floors and common project questions is also available in the FAQ section.
Frequently Asked Questions
Answers to common questions about preparing a garage floor for coating.
Related Guides & Services
Explore more resources for your concrete surfaces.
Concrete Coating Services
Our complete process for protecting and finishing concrete floors.
Surface Prep
Professional cleaning and preparation before any coating or sealing.
Garage Floor Resurfacing
How we handle failed coatings and severely damaged slabs.
Epoxy Garage Floors
Professional epoxy systems for durable, long-lasting garage floors.
FAQ
Answers to common questions about our services and processes.
Ready to Prep Your Floor Right?
Get a free estimate for a professionally prepared and coated garage floor.